This article describes how to install an assembly .dll file in the
Microsoft .NET Framework global assembly cache. To do this, you must have the
administrator rights to install in GAC and in Visual Studio you must install
the .NET Framework SDK. An assembly may
have a strong name to be installed in the global assembly cache.
What is an Assembly? An assembly is a
fundamental part of programming with the .NET Framework. An assembly is a
reusable, self-describing building block of a .NET Framework common language
runtime application.
An assembly contains one or more code components that the common language
runtime executes. All types and all resources in the same assembly form an
individual version of the unit. The assembly manifest describes the version
dependencies that you specify for any dependent assemblies. By using an
assembly, you can specify version rules between different software components,
and you can have those rules enforced at run time. An assembly supports
side-by-side execution. This enables multiple versions to run at the same time. How to deploy an Assembly in GAC? An assembly must have a strong
name to be installed in the global assembly cache. A strong name is a globally
unique identity that cannot be spoofed by someone else. By using a strong name,
you prevent components that have the same name from conflicting with each other
or from being used incorrectly by a calling application. Assembly signing
associates a strong name together with an assembly. Assembly signing is also
named strong-name signing. A strong name consists of the following information:
· The
simple text name of the assembly · The
version number of the assembly · The
culture information about the assembly, if this information is provided. · A public
key and private key pair 
Shared assemblies can be deployed into GAC by using below methods. Method 1:
Drag and Drop Method: Just drag and drop/ Copy Paste an assembly to an assembly folder (C:\Windows\assembly).
Method 2:
Using Visual Studio
Command prompt: Step 1: Go to Microsoft Visual Studio 2010 ->
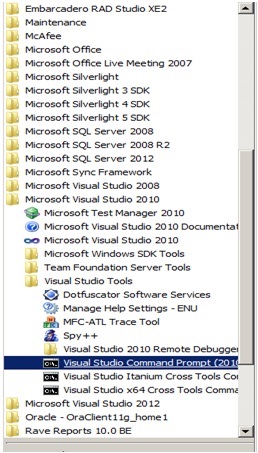
Visual Studio Tools ->Visual Studio Command Prompt (2010).  Step 2: Navigate to the folder where the DLL is
located by using cd Command. 
Step 3: Use the gacutil –I <assembly name
> command to install assembly into GAC. 
Step 4: Once
installation successfully completes, go to C:\Windows\assembly (GAC) location
and you will find the dll. Assembly Signing In Step 1: Create a simple c# Class Library Project that is named as SimpleDll.
Kindly follow the below steps 1. Go to
Microsoft Visual Studio 2010. 2. On the
File menu, click New Project. 3. In the
Templates list, click Class Library. 4. In the
Name box, type SimpleDll, and then click OK. 5. Write a
simple method and save the application. Step 2: Generate a strong name, and then associate the strong
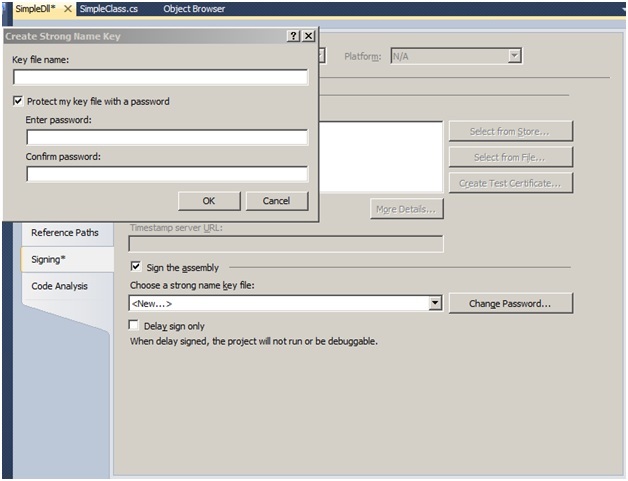
name key file together with the assembly. To do this, follow these steps: 1. On the Project menu, click SimpleDll Properties. 2. On the Signing tab, click to
select the Sign the assembly check box. 3. Under Choose a strong name key
file, click <New>. 4. In the Create Strong Name Key
dialog box, click to select the Protect my key file with a password
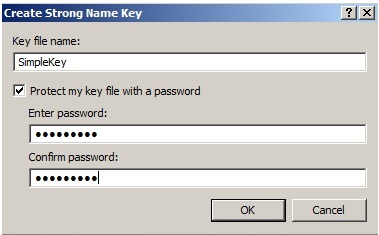
check box.  5. In the Key file name box, type
SimpleKey. 6. In the Enter password box,
type the password that you want to use. 7. In the Confirm password box,
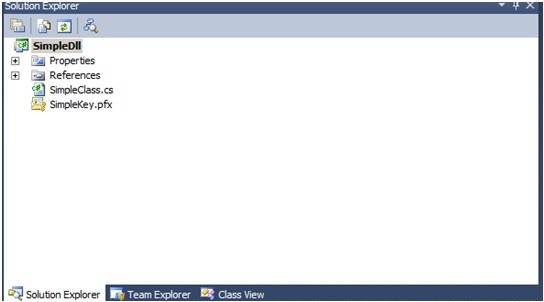
type the same password, and then click OK.  8. SimpleKey.pfx will be created. 9. If you give the Password in Key file
name .pfx file will be created, else
.snk file will be created in project  10. Build the Solution in Release Mode. 11. Take the Dll and install it in GAC
through Method 1 or Method 2.
|